
WordPress Instructions – Working with the Divi Builder
Adding a Blog Post or a Page
- Go to your website URL and add /wp-admin after it, or click the link provided to you.
- Type in your username and password that was given to you
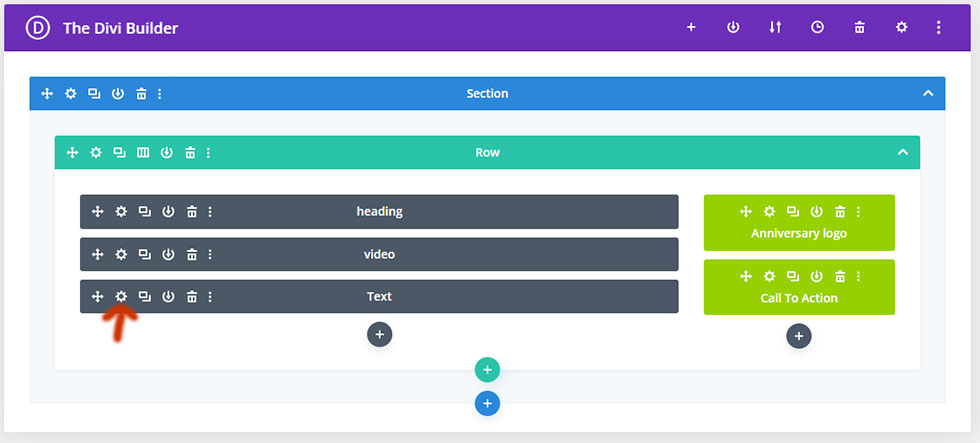
- Once you’re logged in, click either ‘Posts’ over in the left side to add a blog post, or ‘Pages’ to add a page.
- Then click ‘Add New’ at the top of the page.
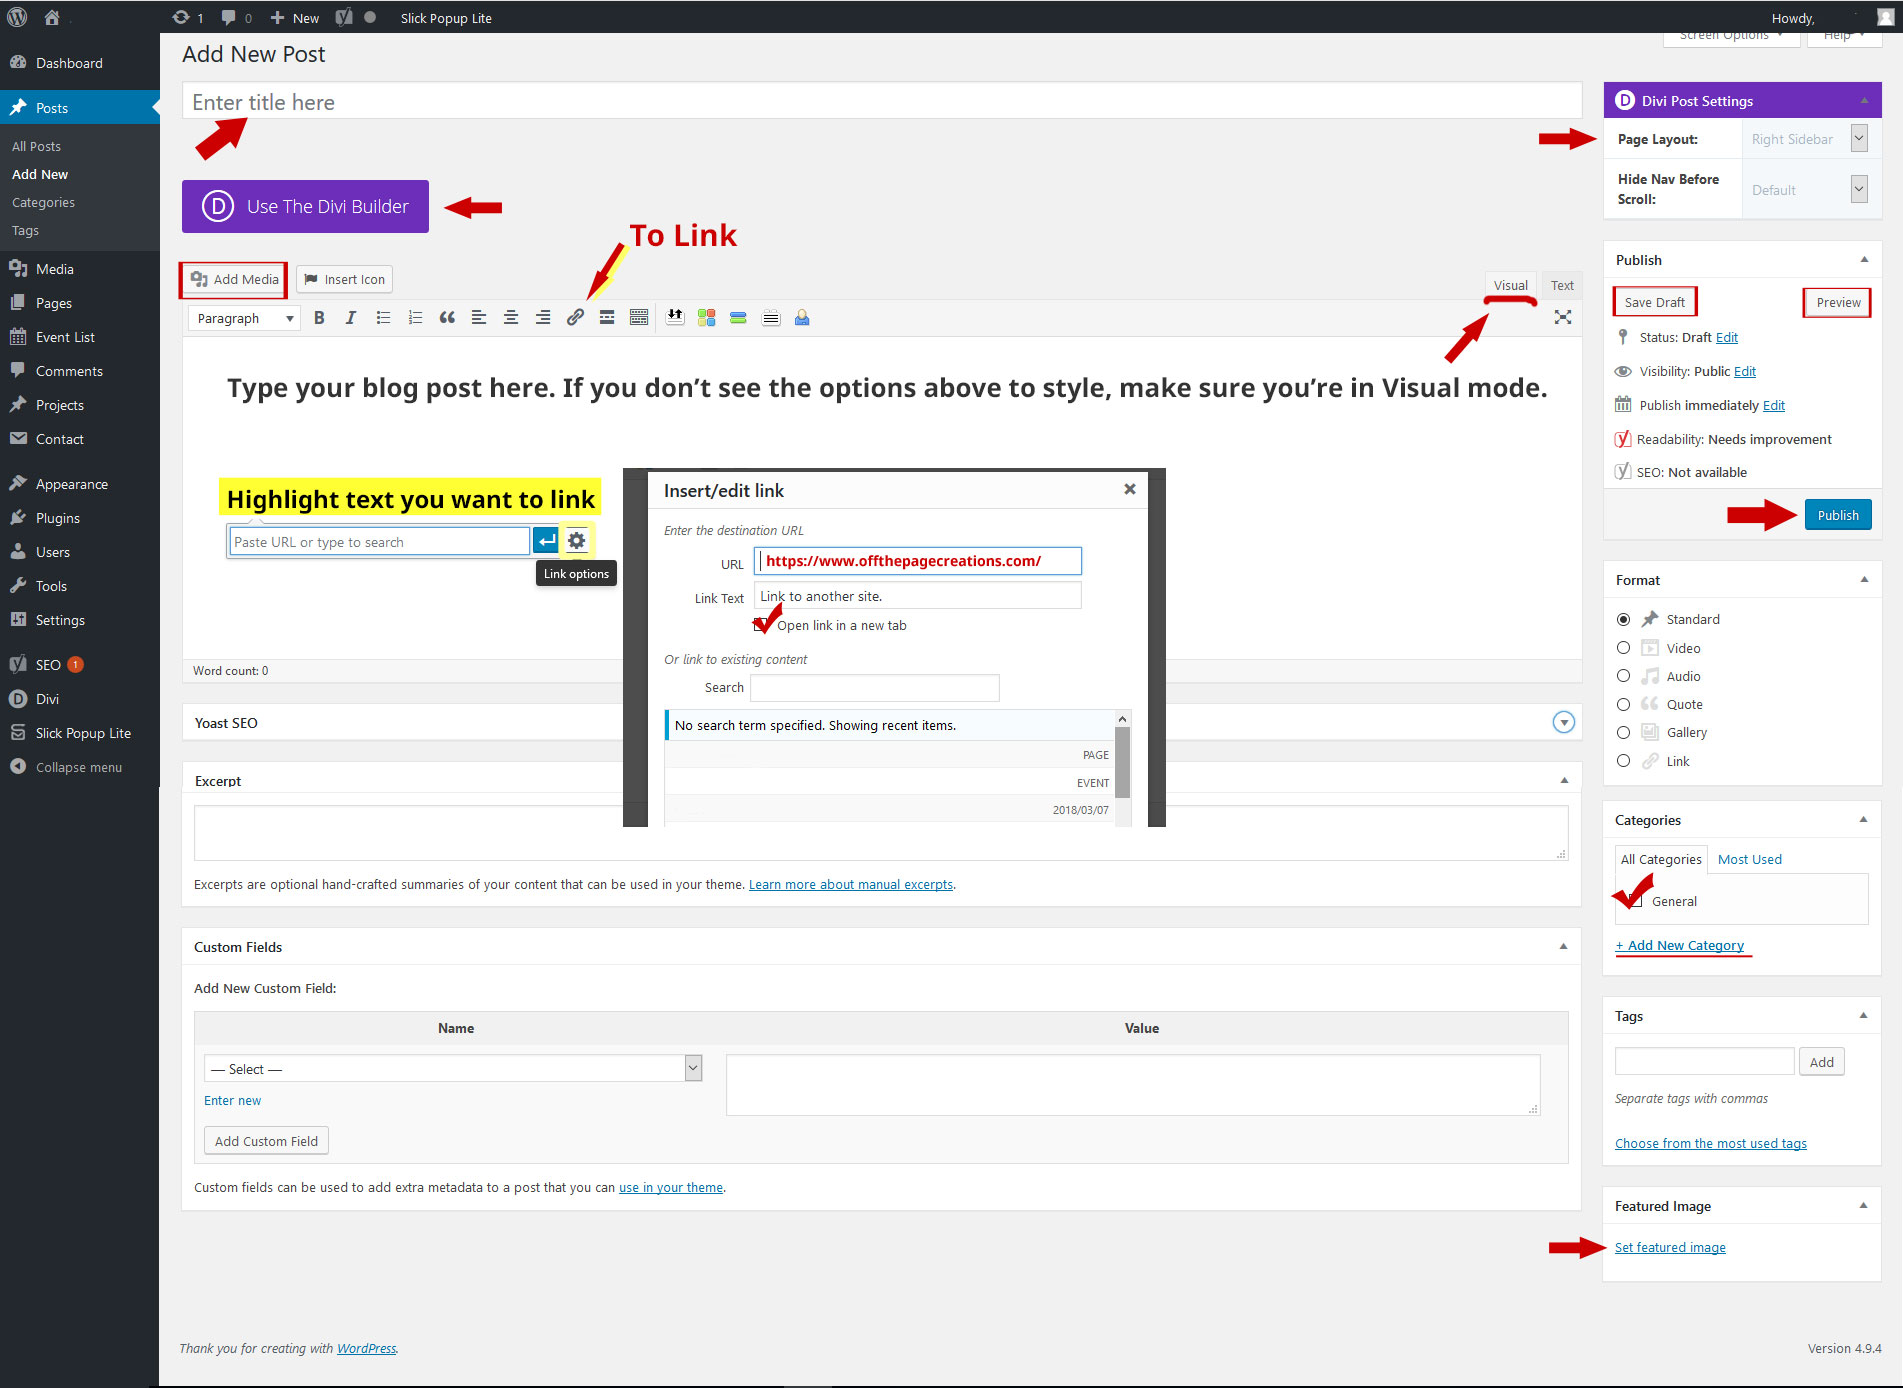
- Enter the title of your post or page where it says ‘enter title here’,
- Click the Purple button that says ‘Use the Divi Builder’
- You can either ‘Build from Scratch’ or ‘Clone an Existing Page’. Cloning an existing page can be easier if it’s a page similar to another page or post.
- If you’ve cloned a page you can click the ‘gear icon’ on the grey text area bar to change the text.

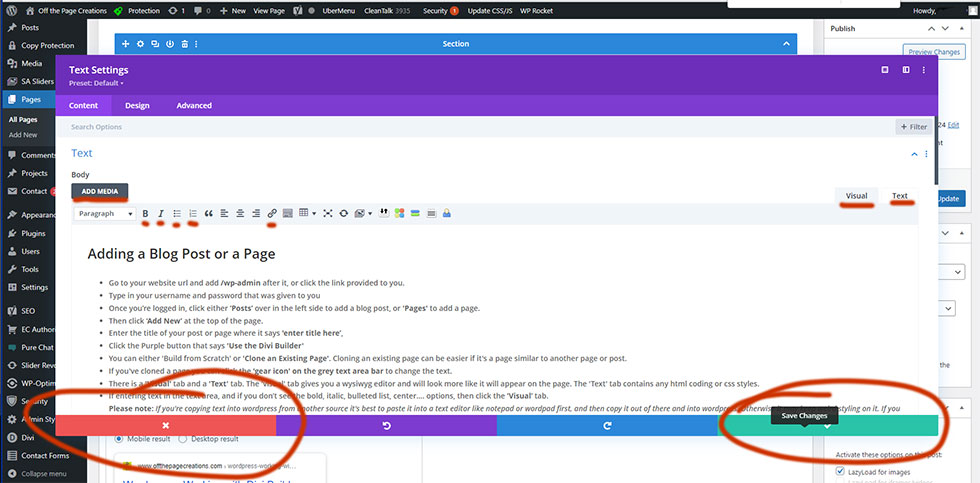
- There is a ‘Visual’ tab and a ‘Text’ tab. The ‘visual’ tab gives you a wysiwyg editor and will look more like it will appear on the page. The ‘Text’ tab contains any html coding or css styles.

- If entering text in the text area, and if you don’t see the bold, italic, bulleted list, center…. options, then click the ‘Visual’ tab.
Please note: If you’re copying text into wordpress from another source it’s best to paste it into a text editor like notepad or wordpad first, and then copy it out of there and into wordpress. Otherwise it may keep weird styling on it. If you want to see if there’s extra styling on your text you can click the ‘text’ tab to the right of the visual tab, to see any coding. - Once you have your text updated you can click the green checkmark to save it, or the red X to not save it.
- Click the ‘Preview’ button on the right column to make sure your updates look good. If they do you can ‘Publish’ the new page or post, or ‘Update’ if you’ve made changes to a live page or post and it will show live.
- If you’ve made a big ‘oops’ and don’t know how to fix it you can get out of the page by clicking anything in the left grey menu and click ‘Discard & Exit’
- If it is a blog post you will also need to check the box by which category you’d like to place it in (the general category is the default), and it will automatically be added the blog. You may also need to click on the ‘Page Layout’ in the top right column and change it to ‘No Sidebar’.
- If it is a new page it will need to be added to the menu (preferably in a drop down so that it doesn’t mess up the spacing in your menu bar on the desktop computer version)
- View the post or page on your website to make sure it looks ok and test any links.
Styling
- If you want to add a photo as a featured photo, click the ‘Set Featured Photo’ link on the right towards the bottom. If you want to add photos in your post, click the ‘Add Media’ button, right above the text area. Normal alignment is left and either medium or full size.
- You can also bold, italicize, make bulleted lists, align text, and link to a URL.
- If you want to add a link, highlight the text and click the chain link icon and paste the URL in, click the gear icon to get the link options and click the checkbox that says ‘Open link in a new tab’ (that way when they close out of the other site your site will still be open).
Editing an Existing Post
- Click the ‘Posts’ or ‘Pages’ link over on the left in grey
- Under the post you want to edit, click the ‘Edit’ link [Make any edits and ‘Update’ to save].
- You can also ‘Trash’ the post here or ‘Quick Edit’.
- Quick Edit is an easy way to change the date, author, category, or Status from Published to ‘Draft’ (if you don’t want it to show).
Need help? Email us.

FREE CONSULTS
For your free consultation, Call us Toll Free at 1‑855‑WEB‑GODS (1‑855‑932‑4637) or 813‑818‑0682 (Tampa, FL) or Email Us